
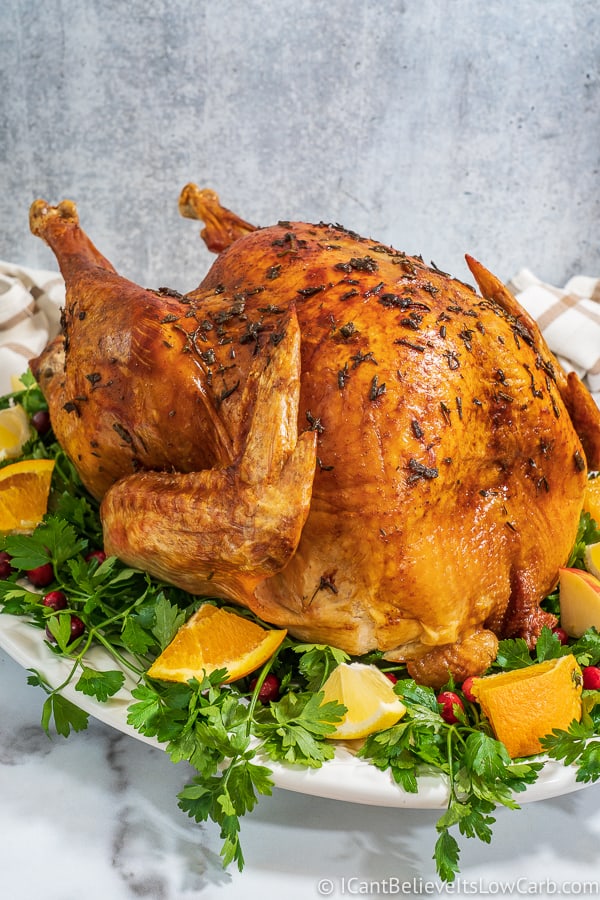
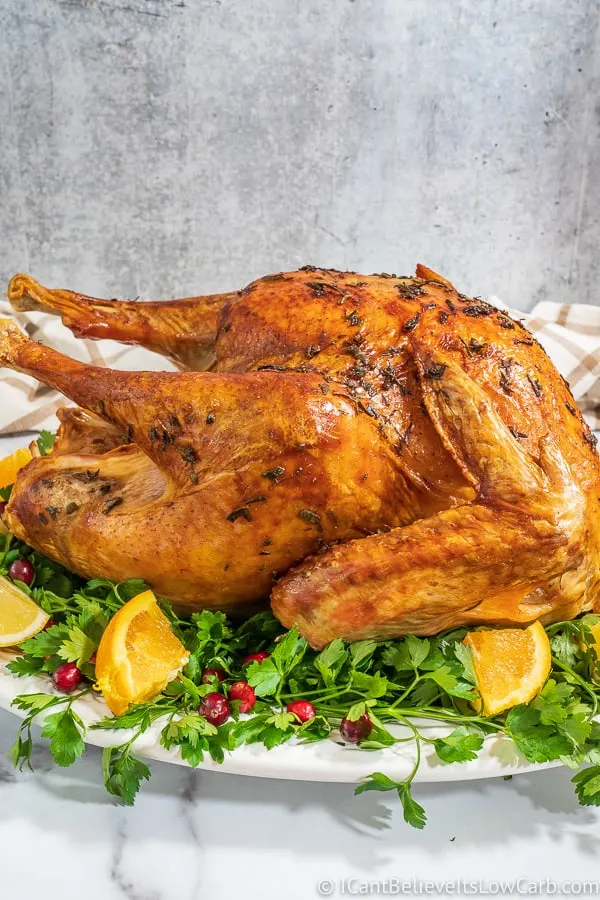
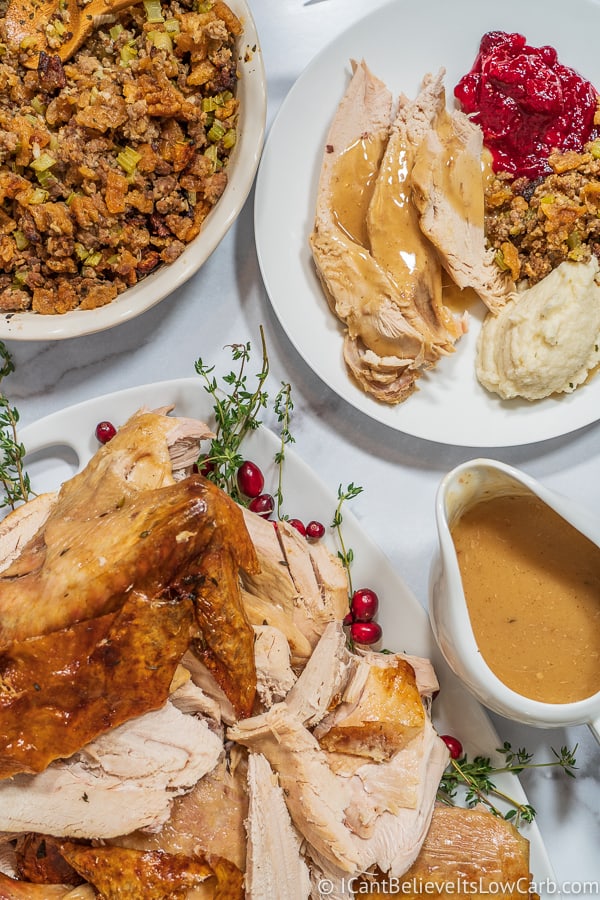
How to cook a perfect Roast Turkey! With no need to brine, and slathered with herb butter you will get a moist, juicy, golden, and delicious turkey!

I’m going, to be honest with you. Since I got married which is almost 10 years, and started cooking, I’ve always been afraid of making any type of large roast in the oven, especially a turkey.
I’ve always thought they are way more complicated than they really are.
Take a huge turkey, for instance, I’ve been nervous and haven’t wanted to ruin one, so I’ve always let my mom make the turkey when deciding to it’s time to cook one.
That being said, I decided to overcome my fear and go ahead and cook myself a turkey.
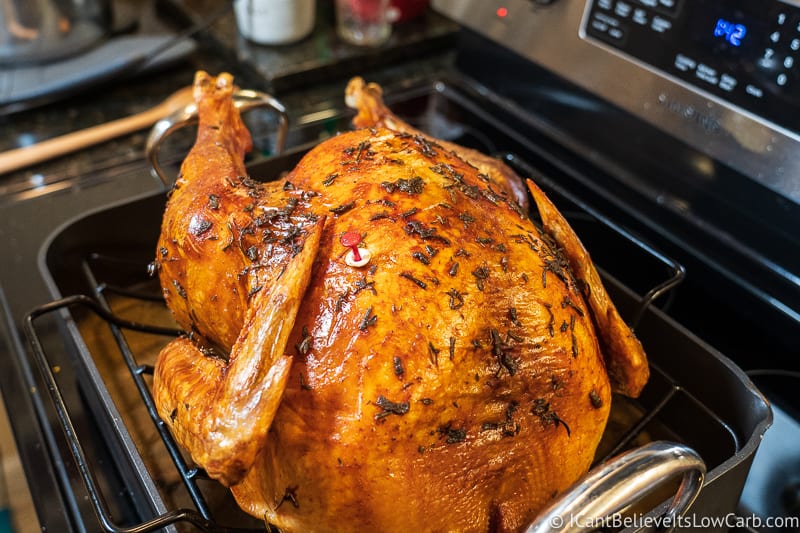
I’m not trying to brag, but my baked turkey came out amazing! With a herb butter rub and only a couple of hours in the oven, my 19 lb turkey was perfection!
Yes, you read it correctly, I said 19 lbs but did I mention it was for only 4 people?
It was the smallest size the grocery store had, but it’s ok because I made care packages of leftovers for several of my friends and I gave the rest of the leftovers to my dad so he could make a soup, it worked out perfectly.
So if you have felt any apprehension about cooking a turkey, then read this article and I will do my best to walk you through how to perfectly roast a turkey in the easiest way possible and answer all your questions along the way.
What Ingredients do you Need to Make a Roast Turkey?
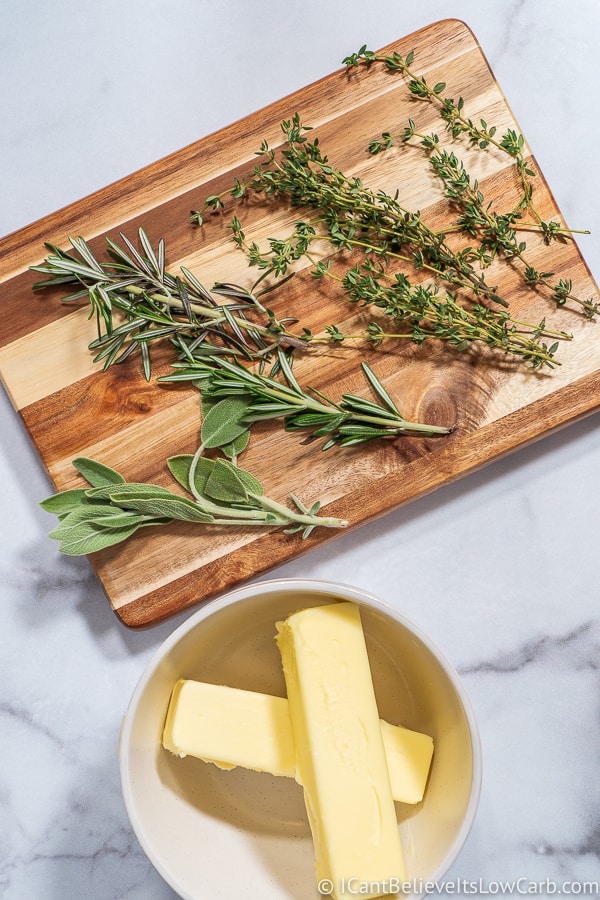
There aren’t very many ingredients needed to bake a turkey honestly. These will do just fine:
Turkey – Cleary this is our main ingredient a necessary.
Butter – 2 sticks of softened butter are good to cover an 18-20 lb turkey
Fresh Herbs – I chose a combo of rosemary, thyme, and sage. But you could use any other fresh herbs that you like. Tarragon would be a nice addition as well.

Properly Thawing a Frozen Turkey
This is the first important step to cooking the perfect turkey. Make sure it’s thawed out before cooking.
I’ll repeat that. It will be much more difficult to bake your turkey if it’s not thawed out properly, so make sure it’s ready before cooking.
Chances are you bought your turkey already frozen, so you will need to put it in the refrigerator to defrost.
A good rule of thumb is to allow about 24 hours for every 5 pounds of turkey. So if you have a 15 lb turkey it should take 3 days, and a 20 lb turkey should take about 4 days.
As the turkey defrosts in the fridge, place a dish towel or paper towels under it to prevent it from leaking all over the shelf in the fridge. Or if you have the room in the fridge place the turkey on a baking sheet, to catch any liquid.
Washing the Turkey
This step is up to you. Washing a turkey before roasting it in the oven is not something you definitely have to do.
If you decide to, then rinse the turkey inside and out with cool water. Then pat the turkey dry with paper towels. If you don’t pat it dry then your seasonings will not stick to the turkey, so don’t skip that step.
Something to keep in mind is if you rinse your turkey out first, then you might want to disinfect your sink after. I personally don’t like to leave raw meat juices in my sink, but that’s me.
Stuffing the Turkey vs Leaving it Empty
My mom has made so many turkeys over the years and she has never believed in stuffing them and here’s why:
Stuffing the turkey adds to the overall cooking time, and not packing the cavity with stuffing will allow the turkey to cook more evenly.
Also, you need to be careful of bacteria forming on the stuffing, because the bird will be overcooked by the time the stuffing reaches a temperature that’s safe to eat. So instead cook your stuffing in a separate casserole dish.
To give your turkey, and drippings/stock more flavor you can fill the cavity of the turkey with other ingredients like: some salt, pepper, and any combination of onion, apple, carrot, celery, lemon, orange, and any herb.
How Long to Cook a Turkey?
Ok, so with this entire subject you are going to get a lot of differing opinions. What temperature should I use? How many minutes per pound should I cook it? How long does a 16 lb turkey take to cook?
If you want to get a perfect roast turkey, I’m going to tell you based on my personal experience what I found to be just the right temperatures and timing.
This is going to be just an estimate of how long it takes to cook the turkey. The actual cooking time will vary on how cold the turkey is to start with, and your actual oven.
So please make sure to check the turkey at least an hour before it’s estimated to be done.
Cooking time will depend on 3 things:
- Turkey Size
- The temperature of the turkey before cooking
- Your oven
What temperature should I cook my turkey on, 325 degrees or 350 degrees? – That’s a good question and can vary based on your oven. What we have found to be the best is preheat your oven to 500 degrees. I know that sounds high, but trust me.
Cook the turkey at 500 degrees for 30 minutes, then turn down the oven to 325 degrees for the remaining time.
How many minutes per pound should I cook the turkey? – Also, I find this to be very controversial and everyone will tell you something different. I’ve heard 13 minutes per pound, 15 minutes per pound, and even 20 minutes per pound. The problem I’ve found is that you don’t want to overcook it.
Again based on our experience and our oven, we found that 11 minutes per pound was a perfect time. Trust me, there’s nothing worse than overcooking a turkey.
I made up a quick way to estimate how long it takes to cook the turkey, but please keep in mind the actual time is going to vary based on your oven, and how cold the turkey is.
The colder the turkey is the longer it can take to cook. So make sure you check the turkey awhile before it’s scheduled to be done.
Here is a quick time chart for roasting a turkey:
This chart is based on the first 30 minutes cooked at 500 degrees, then turned down to 325 degrees for the remaining time. Multiply the weight of the turkey by 11 minutes per pound:
- 10 lb turkey would take about 110 minutes, or 1 hour 50 minutes
- 12 lb turkey would take about 132 minutes, or 2 hours 12 minutes
- 14 lb turkey would take about 154 minutes, or 2 hours 34 minutes
- 16 lb turkey would take about 176 minutes, or 2 hours 55 minutes
- 18 lb turkey would take about 198 minutes, or 3 hours 17 minutes
- 20 lb turkey would take about 220 minutes, or 3 hours 39 minutes
- 22 lb turkey would take about 242 minutes, or 4 hours 2 minutes
- 24 lb turkey would take about 264 minutes, or 4 hours 24 minutes
Again this is just an estimate, so check the temperature early. Using a meat thermometer can help to make sure it’s cooked through.
Don’t Trust the Pop-up Timers, Use Meat Thermometer

Most turkeys come with a “pop up” temperature indicator in them. They aren’t always the most accurate, so I recommend using a meat thermometer as well.
If you don’t have one, then you should get one, it makes life a lot easier, otherwise, it’s too much of a guessing game.
The only way to tell if the turkey is really cooked (it needs to reach a minimum of 165 degrees) is by using a thermometer.
Insert the thermometer into the deepest or thickest part of the meat, about a half an hour before the turkey is done cooking. Test the turkey right from the oven.
If the turkey reaches 160 degrees, you can take it out and let it rest with a tent foil until it reaches 165 degrees. The turkey will continue to cook while resting on the counter.
If you are in a pinch and don’t have a thermometer, then take a knife and pierce the breast meat. The turkey juices should run clear, not pink.
How to Roast a Perfect Turkey

Should I or should I not brine my turkey? How to should I prep my turkey? How should I cook my turkey? Don’t worry we have answers to all of your questions right here:
How to Brine the Turkey
If you buy a good high-quality turkey like a butterball then you don’t really need to brine the turkey. You can brine it if you want, but you can still get a moist turkey without brining it.
First things first, what does it mean to brine a turkey? It means making a saltwater solution and then submerging the turkey for 12-24 hours before roasting.
This helps the turkey retain more moisture while roasting and will help prevent it from drying out. Even if you only have a few hours, brining the turkey can still make it worth doing.
Something very important to keep in mind when buying a turkey is to make sure it hasn’t already been brined or injected with a saline solution. You’re usually safe if you buy an organic turkey.
However, if you see a turkey labeled “enhanced,” “kosher,” or “self-basting,” it means it’s probably already been brined, so you don’t need to brine it again.
To make a basic brine, it’s a mixture of 4 quarts of water and 1 cup of kosher salt.
From here, you add fresh orange or lemon peels, any herbs, spices, and any seasonings you want. Some ideas are whole peppercorns, sage, fresh garlic cloves, and bay leaves.
- Place turkey in a large pot, it’s ok it the turkey is still a little frozen.
- Peel the oranges and lemons, and measure out the spices you are using.
- In a different pot, boil 1 quart of water setting aside the other 3 quarts for now. Once water has begun to boil then add salt and let dissolve. Add citrus peels and all your spices to boiling water. Remove from heat.
- Let the brine cool, once it’s no longer steaming add the other 3 quarts of water. Water should be room temperature. Then pour the brine over the turkey making sure it’s completely submerged. Cover and keep refrigerated for 12-24 hours.
- When ready to roast, remove from the brine and rinse with cool water. Pat dry. Roast the turkey as usual.
The flavor the brine gives the meat is subtle, but it can have a real impact on the skin. It can give you some of the best turkey skin.
Prepping the Turkey

There are a few steps to do in order to get your turkey prepped for roasting.
For starters, you need to make sure it’s thawed out. Don’t forget that it takes about 24 hours for every 5 lbs of turkey to thaw in the fridge.
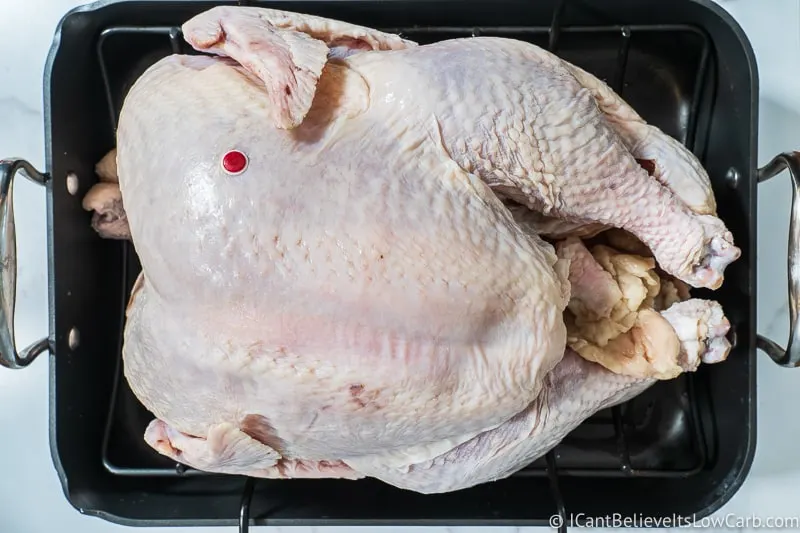
Pull out the neck and the giblets (discard them, or use them in a soup or stew.) Then rinse the turkey in the kitchen sink with cool water.
Put it in the roasting pan, and pat the whole turkey dry using paper towels. This is a very important step. If the turkey isn’t dry, then the herb butter doesn’t stick and will just slide right off.
Rubbing the Turkey
It’s time to make the herb butter rub. The rub is key to getting a perfect roast turkey!
Take 2 sticks of softened butter and but into a small bowl. Add 2 tbsp of minced rosemary, 2 tbsp minced sage, 2 tbsp minced thyme.

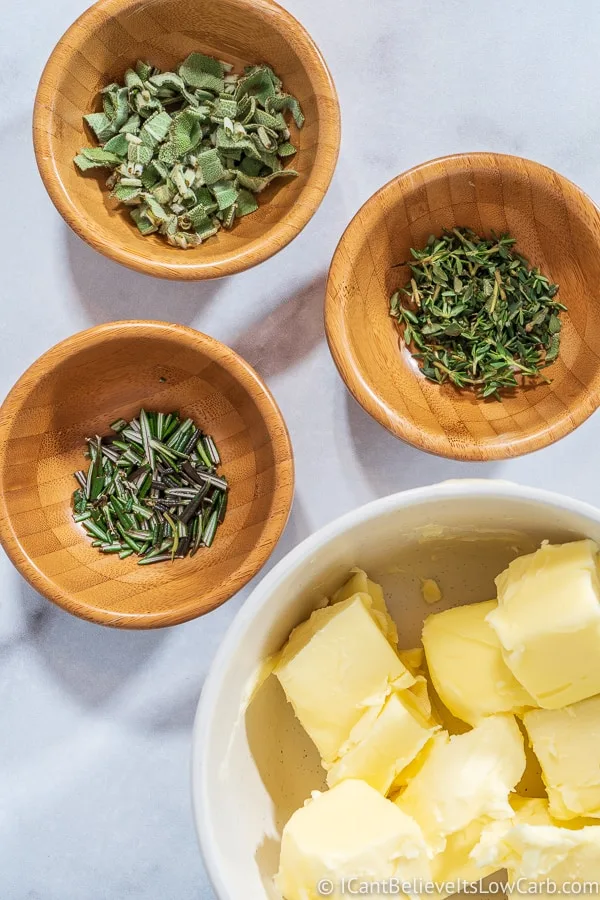
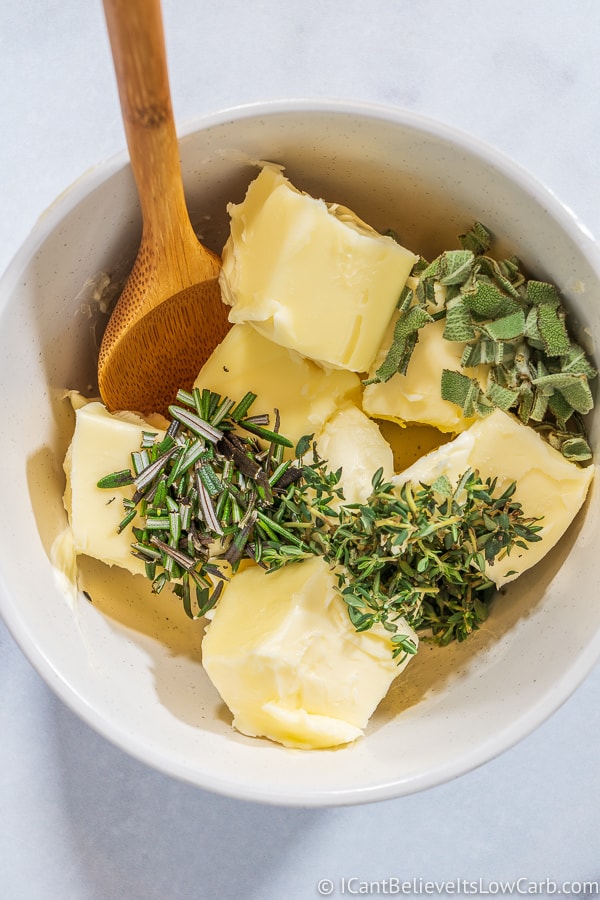

Mix it all together (you might find it easier to use your hands to mix).
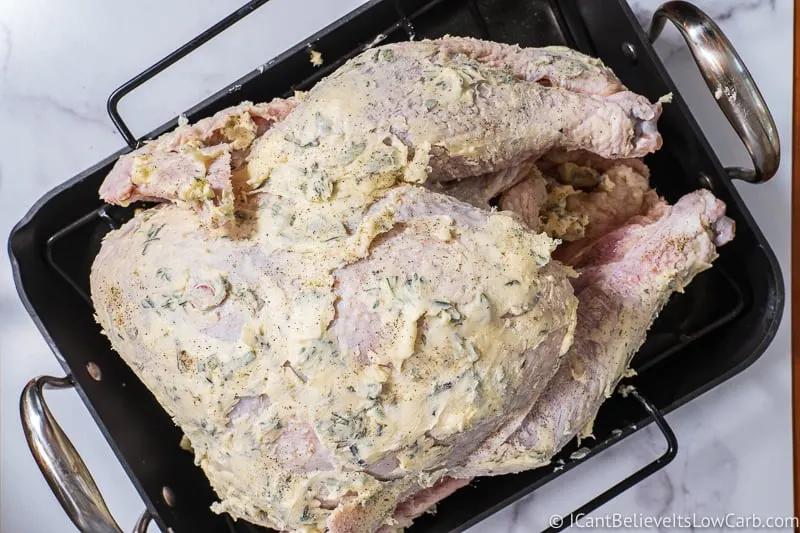
Now that the herb butter is ready, we need to butter up our bird. Use your fingers to loosen and lift the skin about the breasts (on the top of the turkey) and put in a few tablespoons of the herb butter under the skin.
Slather the whole outside of the turkey with the rest of the herb butter. If the whole turkey is covered and you have any leftovers, then you can add it to the inside cavity of the turkey.

At this point, if you are stuffing the cavity with any herbs, fruit, or vegetables, now is the time to do that.
Once you’ve filled the cavity, you can tie the legs together. Tie a string around the two drumsticks. I forgot to do that step the last time I made my turkey, and it was fine, it just didn’t look as pretty.
Cooking the Turkey – Step by Step
Now that your turkey is all prepped, it’s ready to get it roasting in the oven. Before putting it in the oven, preheat the oven to 500 degrees.
I know it seems high but don’t worry it’s important to do it this way if you want your roast turkey to come out perfect!
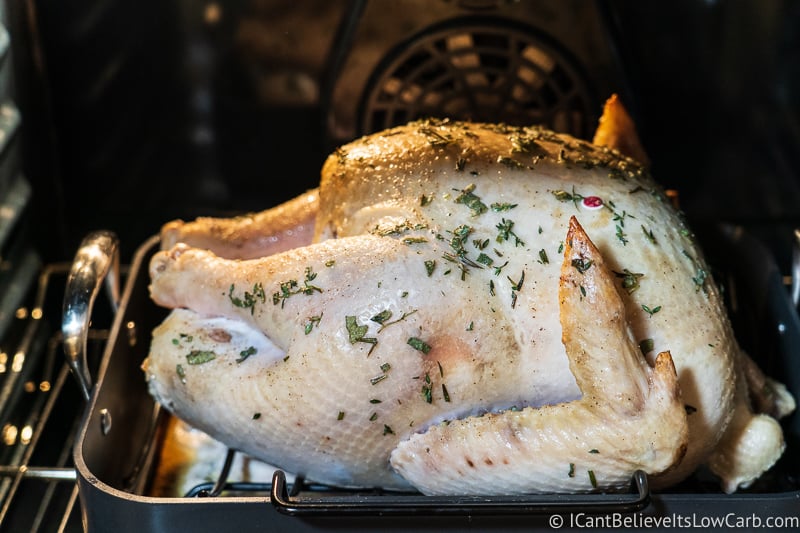

Once it has been preheated, put the turkey in the oven. Set timer for 30 minutes. After 30 minutes, turn the temperature down to 325 degrees.
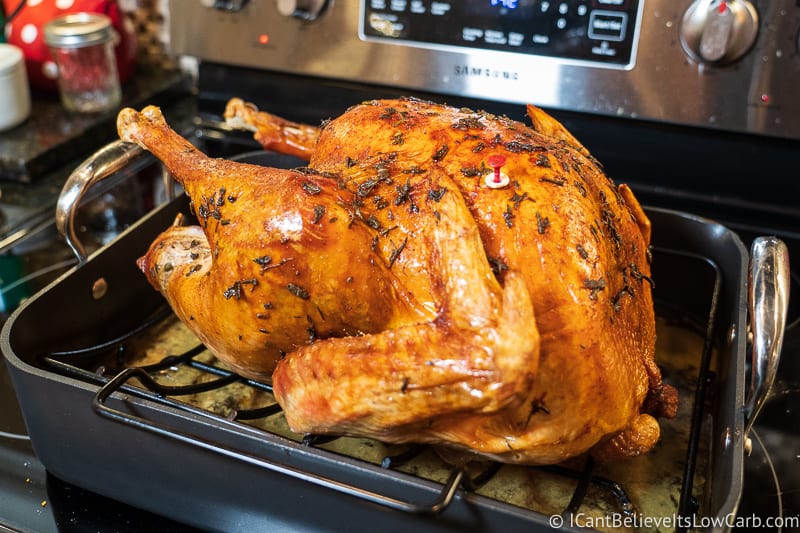
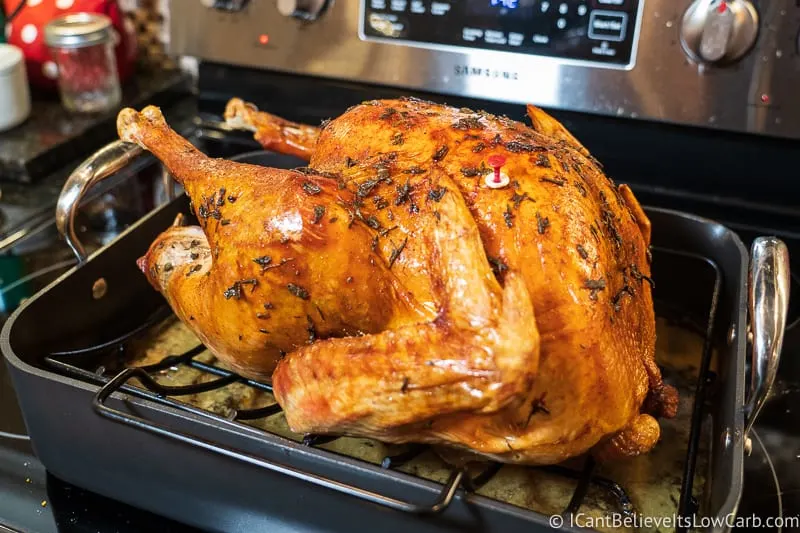
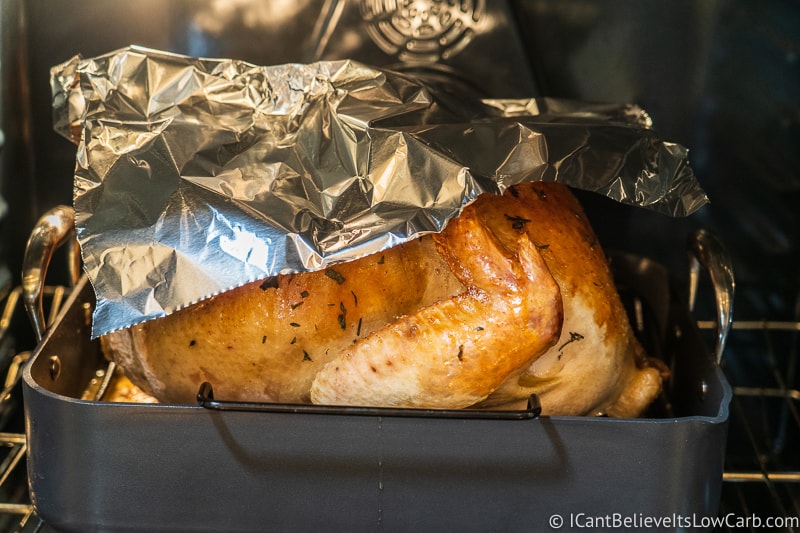
At this point, the skin should start to get golden. To make sure it doesn’t burn, make a tent foil and put it over the turkey. Just lay a piece of foil right over the top, doesn’t need to be fancy.

My turkey was 19 lbs and took a total of 3.5 hours. So check the chart and set the timer based on your turkey weight.
Check your turkey by using a meat thermometer. It should be 165 degrees, in the thickest part of the bird.
If it’s reached 160 degrees, you can take it out of the oven and let it rest on the counter, using foil on top to keep it warm. It will continue to cook while resting.
How to Roast a Still Frozen Turkey
This method is about as straightforward as they come. All you do is preheat the oven to 325 degrees, and put the frozen turkey right into the oven in a roasting pan.
If it’s completely rock-solid frozen, it will take about 50 minutes longer to cook than normal.
You won’t be able to do any special rubs, brining or any other early prep things that you would normally do. It’s going to be the bare minimum with a frozen turkey.
Once the outside of the turkey has started to thaw in the oven, you can brush on some butter and season with salt, pepper, and any other spices you want to add.
Keep in mind that as the turkey cooks it thaws as well. The drumsticks and the wings will cook the fastest, so be sure to check the temperature in different places making sure you get several readings of 165 degrees.
Let the Turkey Sit and Rest
After you remove the turkey from the oven, you need to let it rest for at least 15 minutes, but no longer than 40 minutes. This works out well if you need to finish baking anything else in the oven.
If you are going to make your gravy using the dripping from the pan, then move the turkey to a large cutting board or platter and put a large piece of foil over the turkey while it rests.
Resting your turkey gives the juices in the meat time to settle so when you start carving the turkey, you won’t have juices spilling onto your cutting board. Doing that will help prevent your meat from drying out. No one likes a dry turkey!
How to Carve the Turkey
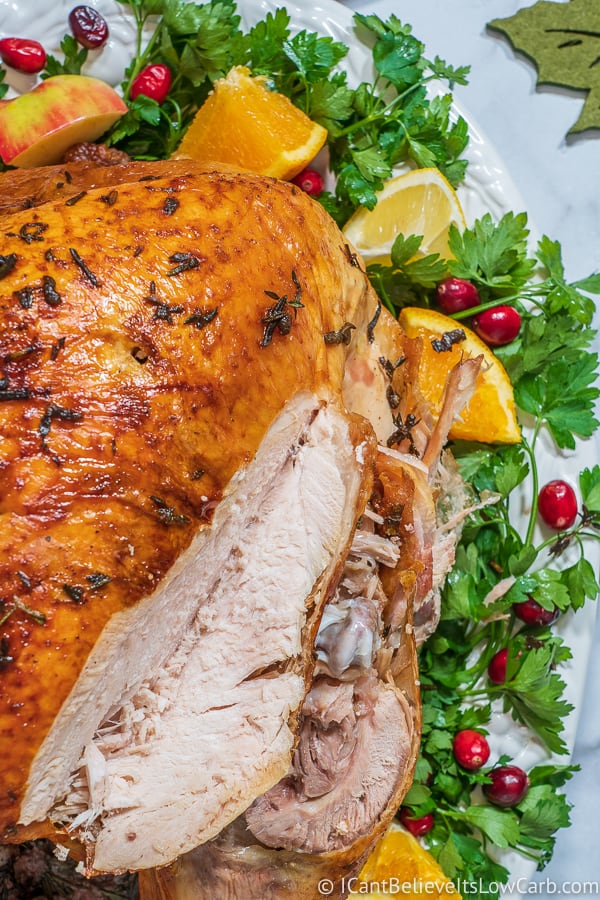

What is the best way to carve a turkey? I know this step might seem intimidating because now that you’ve cooked your bird to perfection, you don’t want to ruin it with sloppy carving.
But it’s ok, you don’t have to worry, I have the simple steps you can follow to carve your turkey right.
- Let your turkey rest. I’ve already explained why this is good to do, but basically it will help the juice from spilling out and will help keep your turkey from drying out. Let it rest for 15-40 minutes.
- What kind of knife should I use to carve the turkey? The first step is making sure whatever knife you use is very sharp. When carving your turkey properly, you want to be able to slice through the skin without shredding it. The main goal should be to slice through each piece of meat making sure that if still has some skin attached to it.
As far as exactly what kind of knife to use if up to you, but you can use a chef’s knife, a carving knife, or a boning knife. But the bottom line is whichever you choose, it needs to be sharp.
- Cutting Board – Make sure you have a large enough cutting board for your turkey. You don’t want half of the turkey hanging off the board as your tying to cut it. Also, if you have a board with a moat around the edge to catch any of the juices, then I’d definitely use that one.
- Remove the Legs – Using your knife slice through the skin between the leg joint and the body, while pulling the leg towards you. Guide your knife around the thigh bone until it pops out.
You’re not cutting through the joint, but you’re just popping it out and cutting through the skin and tissue. Repeat on the other leg and then set both of them aside.
- Remove and Carve the Breasts – The breastbone runs down the middle of the body, and is also called a “keel bone”. Slice through the skin on one side of the keel bone slicing downward, cutting it close to the breastbone, and pulling the breast away with your other hand.
Keep cutting and pulling away until you have removed the whole breast with the skin intact. Place it on the cutting board with the skin facing upward, and start slicing it about a half-inch thick. Repeat the process with the other breast.
- Now you need to Separate the Drumsticks from the Thighs – Turn the leg over on the cutting board, skin side down and run your knife along the natural seam that separates the tow joints. Transfer the drumstick to the serving platter and repeat with the other leg.
- Debone and Carve the Thighs – Place the thigh skin side down on the cutting board. Cut away the meat along one side of the thigh bone, and then roll the bone the other way and cut along the other side. Slice the thigh meat about half an inch thick and arrange on a platter.
- Remove the Wings – The wings are the last thing to take apart. You can probably just pull them off at this point, but use the knife to cut around the skin. Move to a platter.
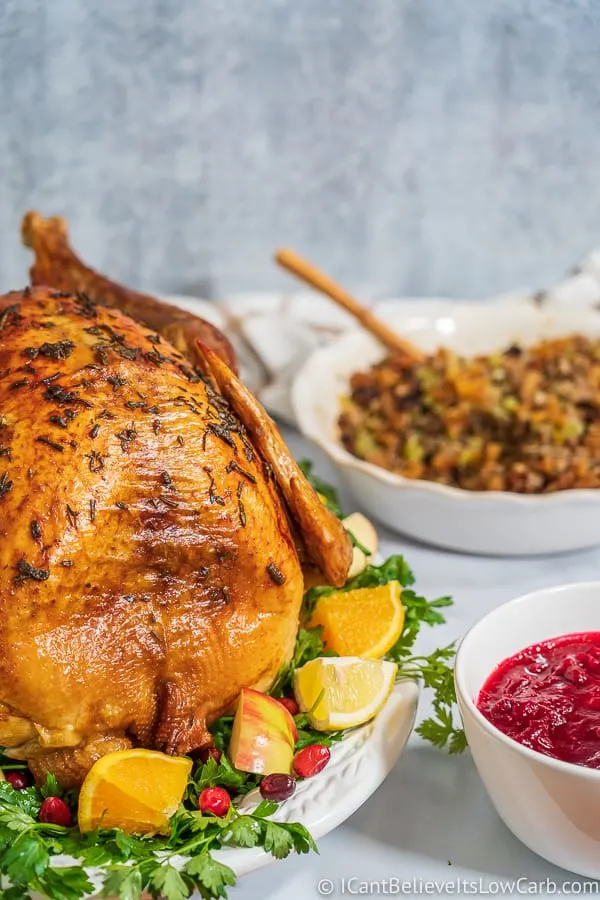
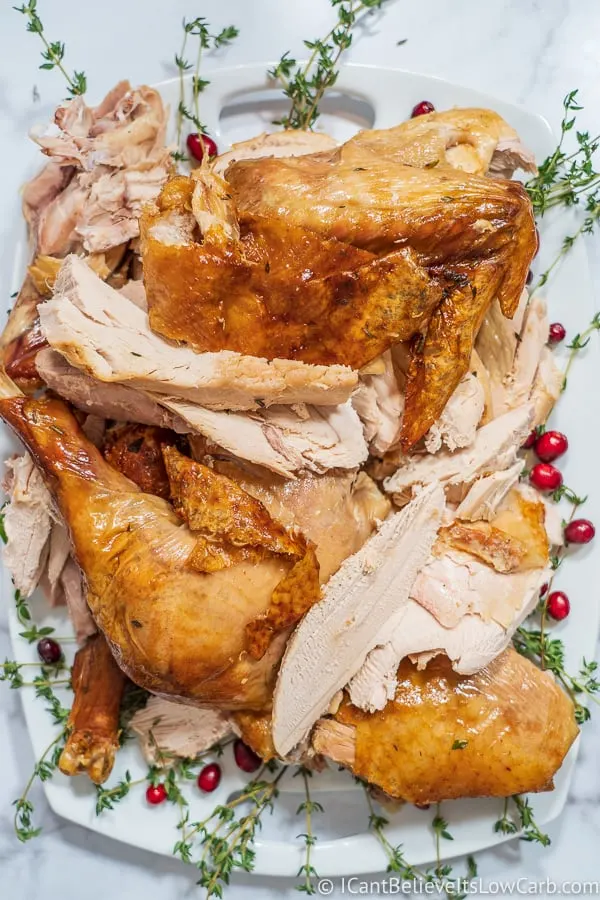
Now that you have finished carving your turkey it’s time to put your beautiful platter on the table and let everyone enjoy your hard work.

Other Important Tips for Cooking a Turkey

Here are just a couple of other tips for cooking your turkey. I hope all this information really helps you!
What do you Put in a Turkey Cavity?
So I’ve already talked about not putting stuffing inside the turkey cavity. But that doesn’t mean you can’t put anything inside the cavity to give it some extra flavor. Here are a few ideas:
- Onions
- Celery
- Carrots
- Apples
- Lemons
- Oranges
- Sage, Rosemary Sprigs, Thyme Sprigs
Do I have to Baste the Turkey?
No, it’s not necessary to baste your turkey. It requires you to constantly open the oven, and then that will cause the oven to lose heat and the turkey will take longer to cook and can dry out.
Basting is done to produce a beautiful golden brown skin, but by smearing herb butter all over the skin of the turkey, it will ensure that the skin will brown beautifully.
How to Make Gravy from the Turkey
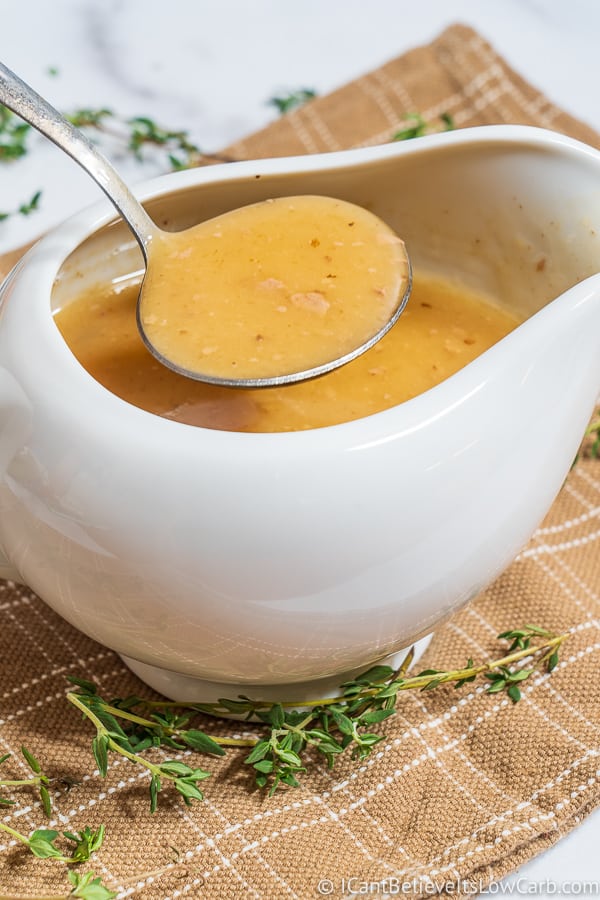

After your turkey has finished cooking there will be some nice juices and browned bits in the bottom of your roasting pan, which makes the best gravy. We have an entire recipe for making homemade low carb gravy for more details, but here are some small steps below:
Pour the juices and drippings into a small saucepan.
Normally you would add some white flour, cook it over medium-high heat and make a roux. But to make a delicious low carb and keto gravy, all you need to do is add 2 tsp xanthan gum to the turkey drippings.
Whisk over medium-high heat, and let it thicken.
Now you have a classic old fashioned turkey gravy, without the carbs, and gluten-free.
Variations on a Roast Turkey
A variation my mom does a lot for her turkeys is rather than doing a herb butter rub she covers the whole turkey in bacon. Yup, you read correctly I said bacon.
Once your turkey is rinsed and put into the roasting pan, take a pound of thin-sliced bacon and start wrapping the turkey with each slice of bacon. Bake according to the normal instructions.
What Diets is a Roast Turkey Good for?
Are all roasted turkeys gluten-free? All fresh or frozen turkeys don’t contain gluten in them. It’s all about how you roast them. But to be honest there is absolutely no reason to add any gluten to a roasted turkey.
My roasted turkey only has fresh herbs and butter, making it perfect for those of you out there who are gluten-free.
Is this roasted turkey dairy-free? Sadly no, not this recipe because it contains butter. But don’t get too upset we can definitely make this roasted turkey dairy-free.
All you need to do is replace the butter with either a butter substitute such as Earth Balance or use olive oil to coat your turkey. See super simple!
Obviously turkey is low in carbs, so it’s great if you are doing a Keto diet, sugar-free, or just eating low carb in general.
What to Serve with a Roast Turkey Dinner?

Turkey dinner is one of my favorite meals, but what are some other things to eat with turkey dinner? Your obvious choices are the following:
- Cauliflower Mashed Potatoes
- Low Carb Gravy
- Cranberry Sauce
- Low Carb Sausage Stuffing
- Roasted Green Beans
- Bacon Roasted Brussel Sprouts
- Low Carb Almond Flour Biscuits
How to Store Leftover Turkey
Turkey can be properly stored in the refrigerator. But how long is turkey good for in the fridge you might wonder? Store it in an airtight container for up to 4 days.
Something to keep in mind about storing your turkey is that the leftover meat needs to be refrigerated within about 2 hours of cooking because after that the risk of bacteria starting to grow will increase.
Can You Freeze Leftover Turkey?
Yes, you can freeze your leftover turkey. Put in Ziploc freezer bag, or in an airtight container. It doesn’t last much longer than about 2 months in the freezer.
If you decide to make some soup with your turkey, that can be frozen as well. Put the soup in an airtight container and freeze for a couple of months.
What to Make with Leftover Oven-Baked Turkey
Personally I just love to eat turkey leftovers with all the other classic side dishes as well for at least a day or two.
But you can do other things with your leftover turkey as well:
- When finished with the turkey you can save the carcass to make delicious turkey soup.
- Fresh turkey sandwich
- Turkey Pot Pie


Perfect Roast Turkey Recipe – Juicy and Easy to Cook
- Total Time: 3 hours 45 minutes
- Yield: Serves 12–14 people 1x
Description
How to cook a perfect Roast Turkey! With no need to brine, and slathered with a herb butter you will get a moist, juicy, golden, and delicious turkey!
Ingredients
- 19 lb turkey
- 2 sticks butter
- 2 tbsp chopped fresh rosemary
- 2 tbsp chopped fresh thyme
- 2 tbsp chopped fresh sage
Instructions
- Thaw out the turkey. Keep in mind that it can take up to 3-4 days to thaw in the refrigerator depending on the size of your turkey. It takes about 24 hours for every 5 lbs of turkey to thaw.
- Once thawed and ready to go, preheat the oven to 500 degrees.
- Pull the neck and giblets out of the turkey. Either discard or save to add to turkey soup.
- Rinse the turkey with cool water. Then using paper towels, pat the whole turkey dry. Your butter rub won’t stick if the turkey skin is wet.
- In a small bowl combine 2 sticks of softened butter, 2 tbsp chopped rosemary, 2 tbsp chopped sage, 2 chopped thyme. Mix together, you might find it easier to use your hands.
- Spread the herb butter all over the turkey. If the turkey is completely covered, then add the rest of the butter to the inside of the cavity.
- If you choose to stuff the turkey with any vegetables, insert them into the cavity of the turkey now.
- Tie a string around the 2 legs. It’s ok if you forget this step, but your bird won’t look as pretty but will still taste good.
- By now the oven should be preheated. Put the turkey in the oven and cook for 30 minutes.
- After the timer goes at 30 minutes, turn the temperature down to 325 degrees for the remaining cook time.
- The skin should start to get golden brown, but to ensure it doesn’t get burnt, make a tent foil and put it over the turkey. Just lay a piece of foil over the top of the bird. (Check the chart above for cooking times)
- Check the turkey using a meat thermometer. It needs to be at 165 degrees in the thickest part of the turkey.
- Take out of the oven and let it rest for 15-40 minutes.
- Carve your turkey. (See instructions above on how to carve a turkey)
Notes
- See above instructions for how to brine a turkey
- It takes about 24 hours per 5 lbs of turkey to thaw in the fridge
- Remove the neck and giblets from the cavity
- Remove the turkey about 30 minutes before working with it
- This is a very important step…after you rinse the turkey, make sure to pat the whole bird dry otherwise your butter rub will not stick to the turkey
- Don’t stuff the turkey with stuffing. But you can stuff it with vegetables or fresh herbs
- To make sure you have enough to make gravy, add about 4 cups of water to the bottom of your roasting pan
- See the chart above for cooking times
- Using a meat thermometer the turkey needs to reach 165 degrees
- You can roast a turkey while still 100% frozen, but it will take about double the amount of time to cook plus you can not start it with any type of rub
- Cover the turkey with a piece of foil while roasting so the skin doesn’t burn
- Let it rest on the counter for about 15-40 minutes so the juices soak into the bird
- For help carving the turkey, see above instructions
- Prep Time: 15 minutes
- Cook Time: 3 hours 30 minutes
- Category: Main Courses
- Method: Baking
- Cuisine: American
Hina Jason
Tuesday 14th of January 2020
Thank you for sharing your recipe. I never used butter before in the recipe and that was the reason my turkey would turn out to be so hard.All the ingredients you have mentioned are so important for roasting a perfect turkey.
Leigh Oskwarek
Saturday 18th of January 2020
Thank you so much for replying to our turkey recipe. We are so glad that you enjoyed it and we are happy to have solved your problem. Please let us know how your turkey comes out. Please try some of our other recipes and let us know what you think.